Table of Contents
- Step 1: Setup Account
- Step 2A: Add Application
- Step 2B: Add Placement
- Step 3: Add Bidders
- Step 4: Reports & Insights
- Step 5: Publisher Controls
Getting Started
HyBid Cloud is a server-side ad monetization and bidding platform for publishers, based on open-source technologies and open standards. Our goal is to enable publishers to run their own in-house stack by offering complete ownership, transparency and control, while removing the hassle and challenges that come with maintaining it themselves.
Please NoteHyBid Cloud is currently available in private beta to select publishers and will work side-by-side all major client-side mediation/bidding solutions such as MAX, Google AdManager, Digital Turbine, and Ironsource.
Why HyBid Cloud?
HyBid Cloud is built for a publisher first-world and provides a platform that is open, complements your existing stack and adds the missing features, with minimal effort at your end.
- Flexibility to add bidders (SSPs): We have 10+ connections (SSPs) that are currently certified. More connections will be made available via oRTB and PreBid soon.
- Ease of use: If you are currently using the HyBid SDK, then you can get started immediately and effortlessly.
- Neutral and Transparent: HyBid Cloud is an open platform that does not have any supply-side (publishing interest) or demand-side affiliation (advertising preference).
If you are new to the Verve platform and would like a walkthrough of our monetization suite and solutions, please contact supplybd@verve
Integration
SDK Integration
HyBid Cloud utilizes our monetization SDK (HyBid SDK) and the integration workflow remains the same as for HyBid SDK. If you are a new publisher, we would recommend that you begin by following the SDK integration steps detailed below:
- For iOS developers
- For Android developers
Account Onboarding
Please NoteHyBid Cloud is currently in private beta and therefore more features are being enabled for publishers on an ongoing basis. If you wish to access certain features that aren't covered in the documentation or would like to know more about the product roadmap, please do contact us. We would be happy to walk you through our pipeline of features.
Step 1: Setup Account
Once you have successfully integrated the HyBid SDK, the Verve Account Manager will activate the HyBid Cloud dashboard for your account.
The dashboard can be accessed at https://hybidcloud.verve.com

Step 2A: Add Application
Once your account is active (and you can successfully log in), you can then proceed to add your app and create placements under the specific app.
- Go to the Apps tab on the side menu. The Apps section allows you to create new Apps for your account.
- Click on the App Name to bring up the App Settings.
- Add all relevant app information including Store Application Id, Application Category, Auth Token etc before you proceed to creating your placement (Zones).
- Once you have entered the app information, proceed to the Zones view.

Step 2B: Add Placement
The Zones view allows you to create new placements for your App. The HyBid SDK integration documents will show you a detailed step-step workflow on how to use relevant Zone values during the integration.
- Add a Zone Name (Placement Name)
- You can choose between S (Small Banner), M (MRect) or L (Interstitial) sizes, and add relevant sizes that your placements support.
- Click Create to save and proceed.

Step 3: Add Bidders
The Bidders view allows you to create a new connection to a certified bidding partner on HyBid Cloud. The Bidding partners (SSPs) currently supported are:
- PubMatic
- Magnite
- OpenX
- Mobile Fuse
- Tappx
- Verve*
- Smaato
- InMobi
(more integrations are underway and will be rolled out soon)
*Note: The Verve marketplace is enabled by default in your account.
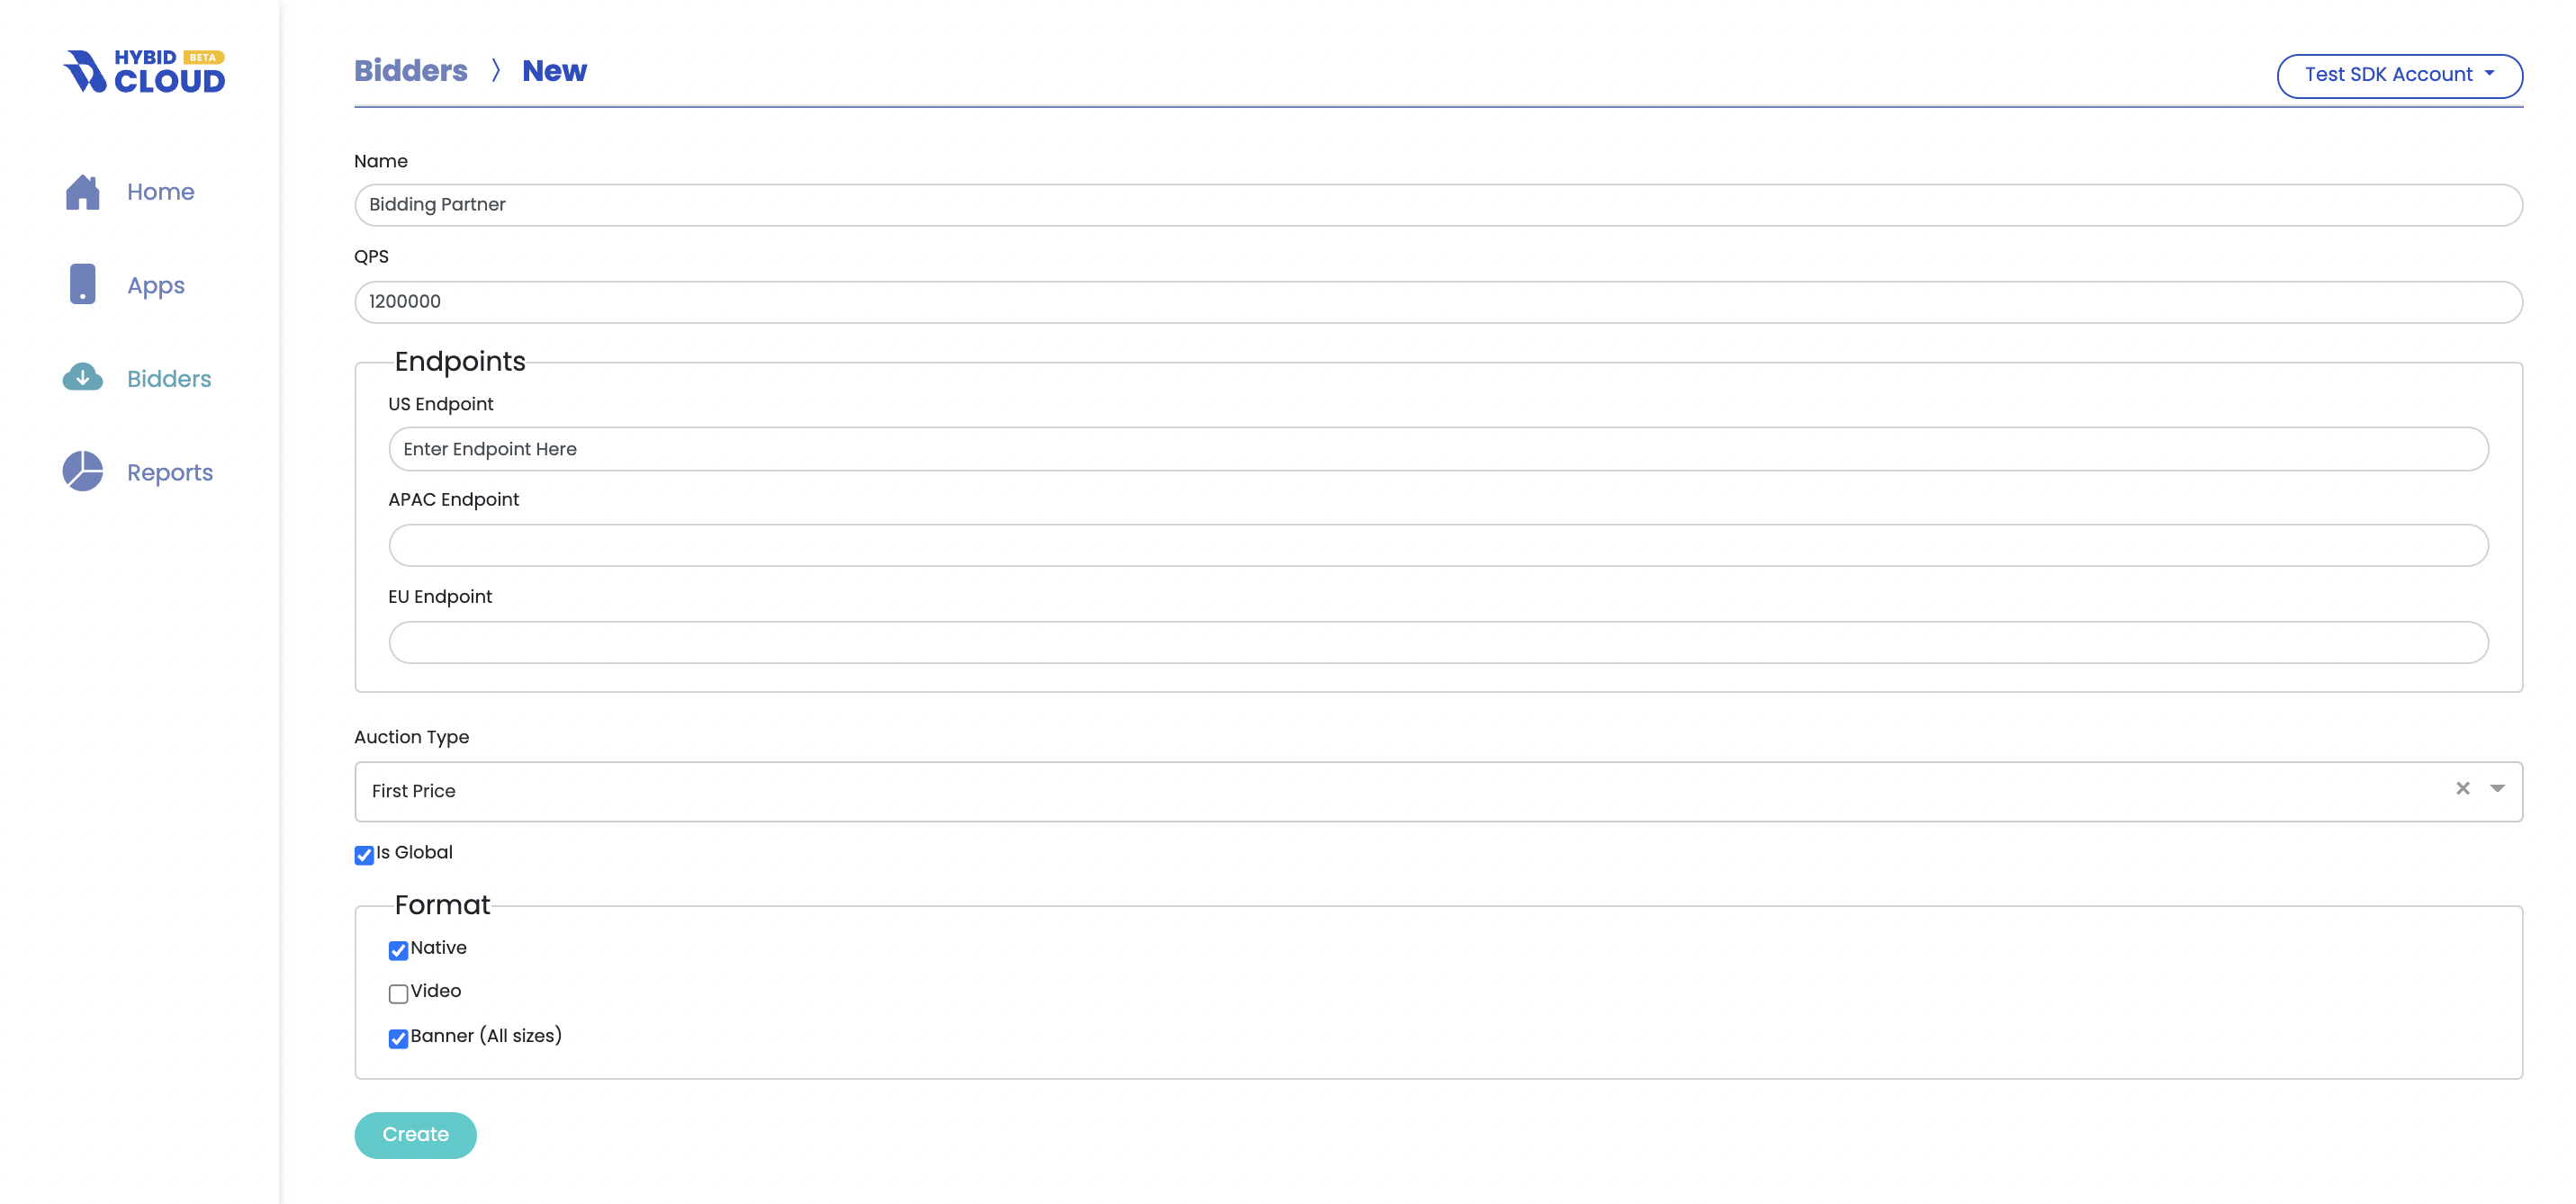
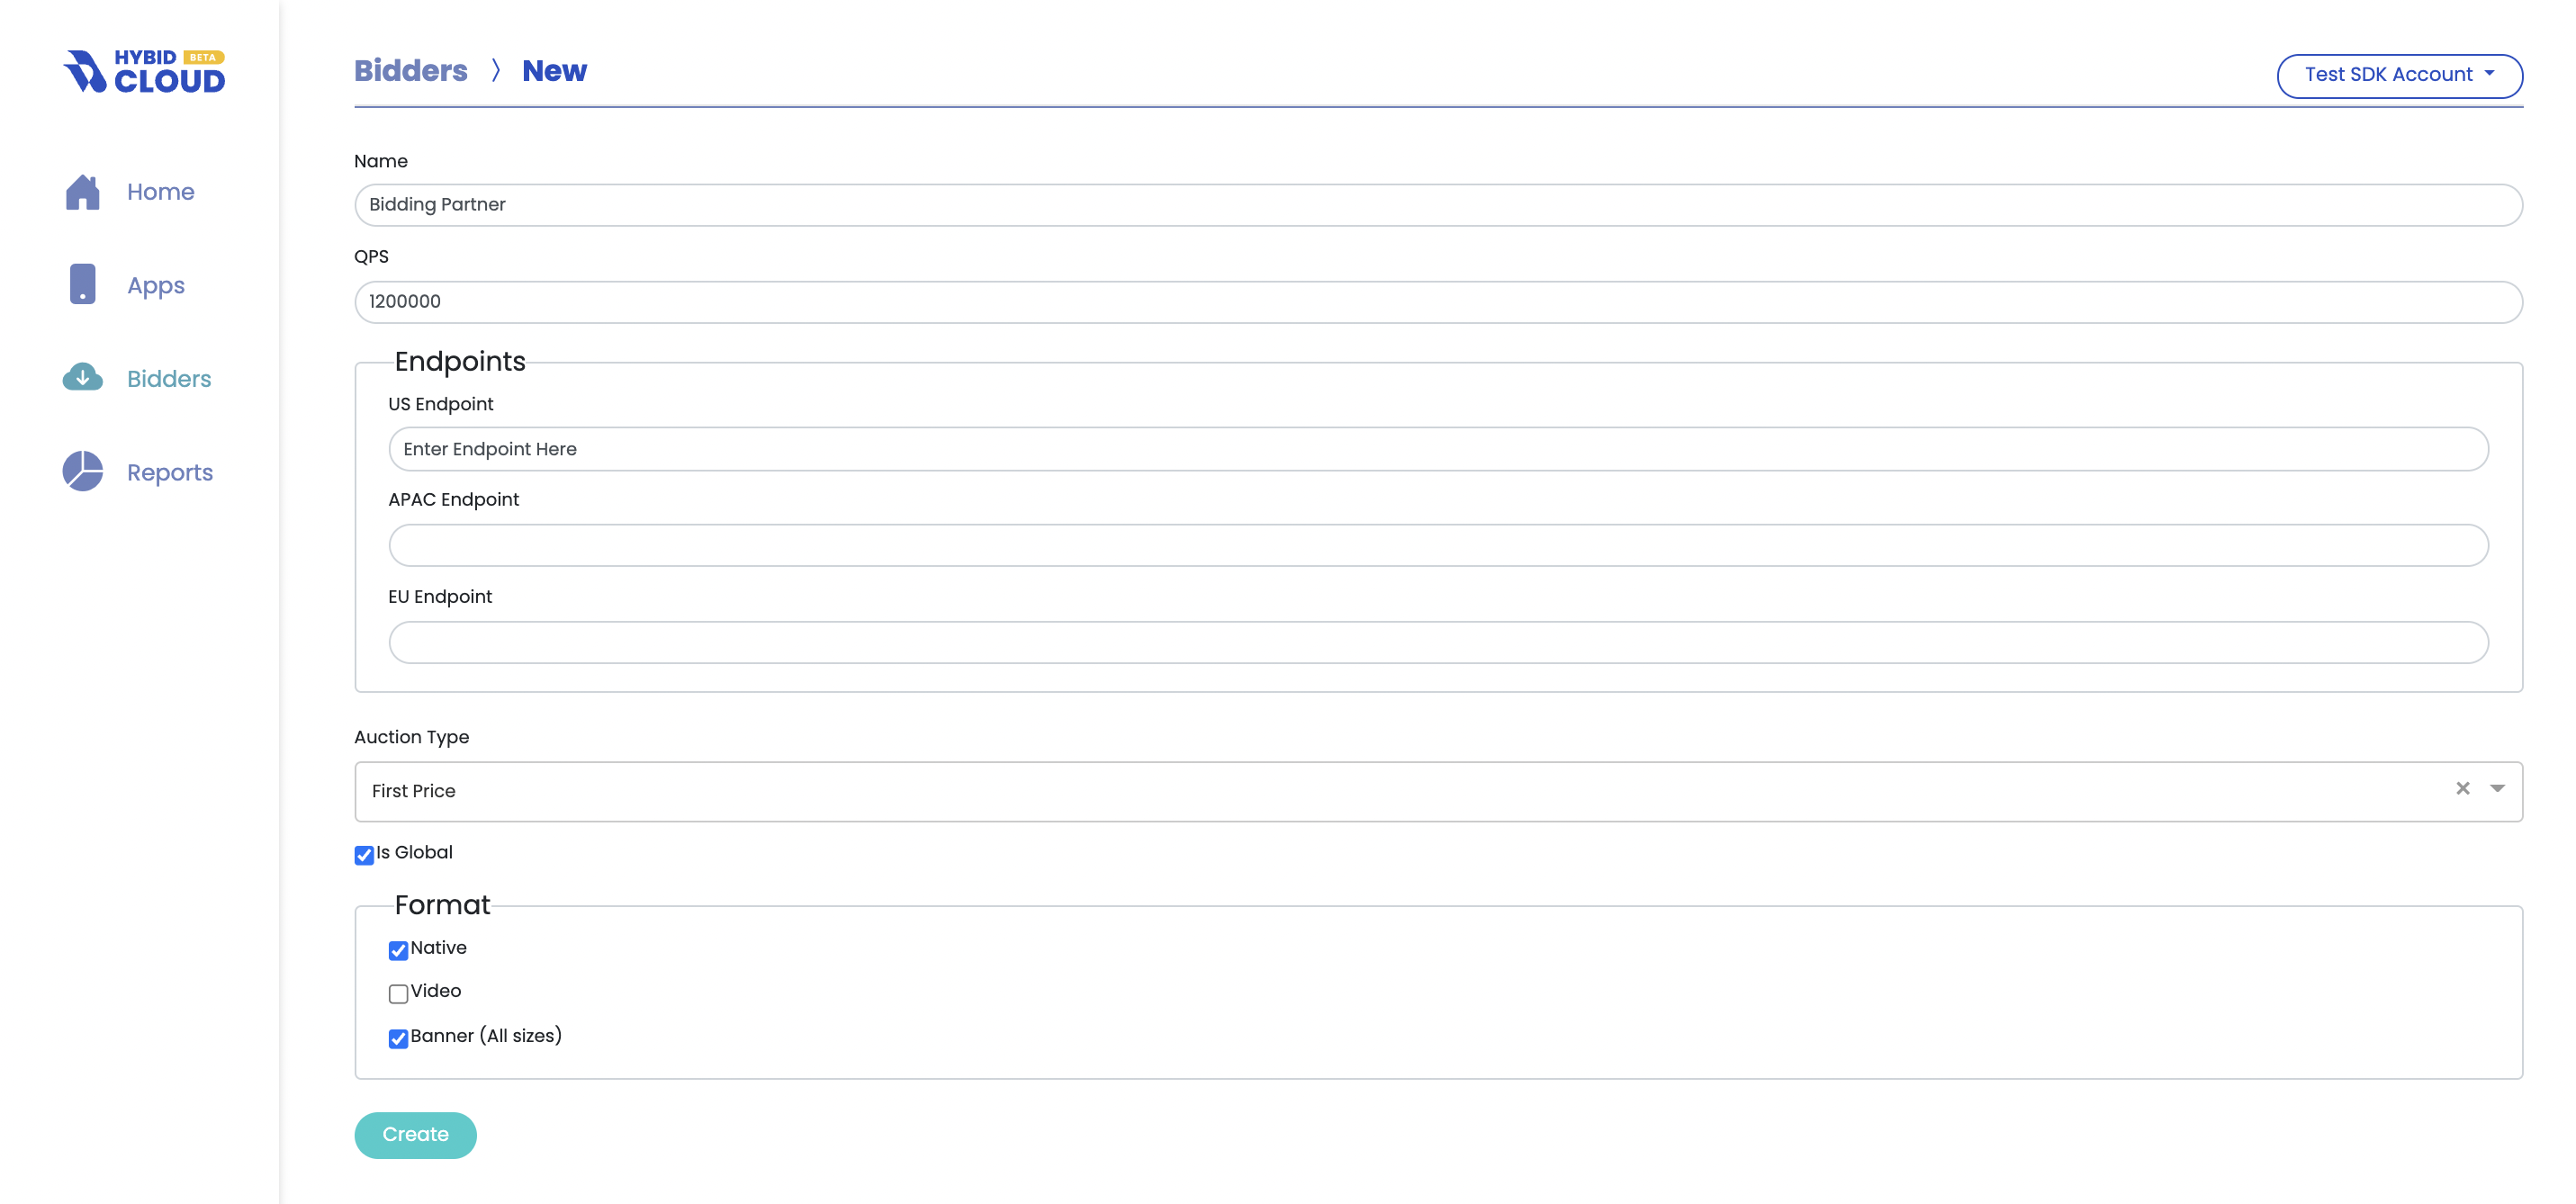
- Click on Create New Bidder to add your preferred bidding partners.

- In the Bidder creation view, enter the information that your Bidder has provided to you. This includes details such as:
- Endpoints per region,
- Auction Type,
- Formats and
- QPS

- Click Create to save and proceed.
- The Bidder Edit view allows you to change the settings, and activate or deactivate a certain bidder at any time.
Step 4: Reports & Insights
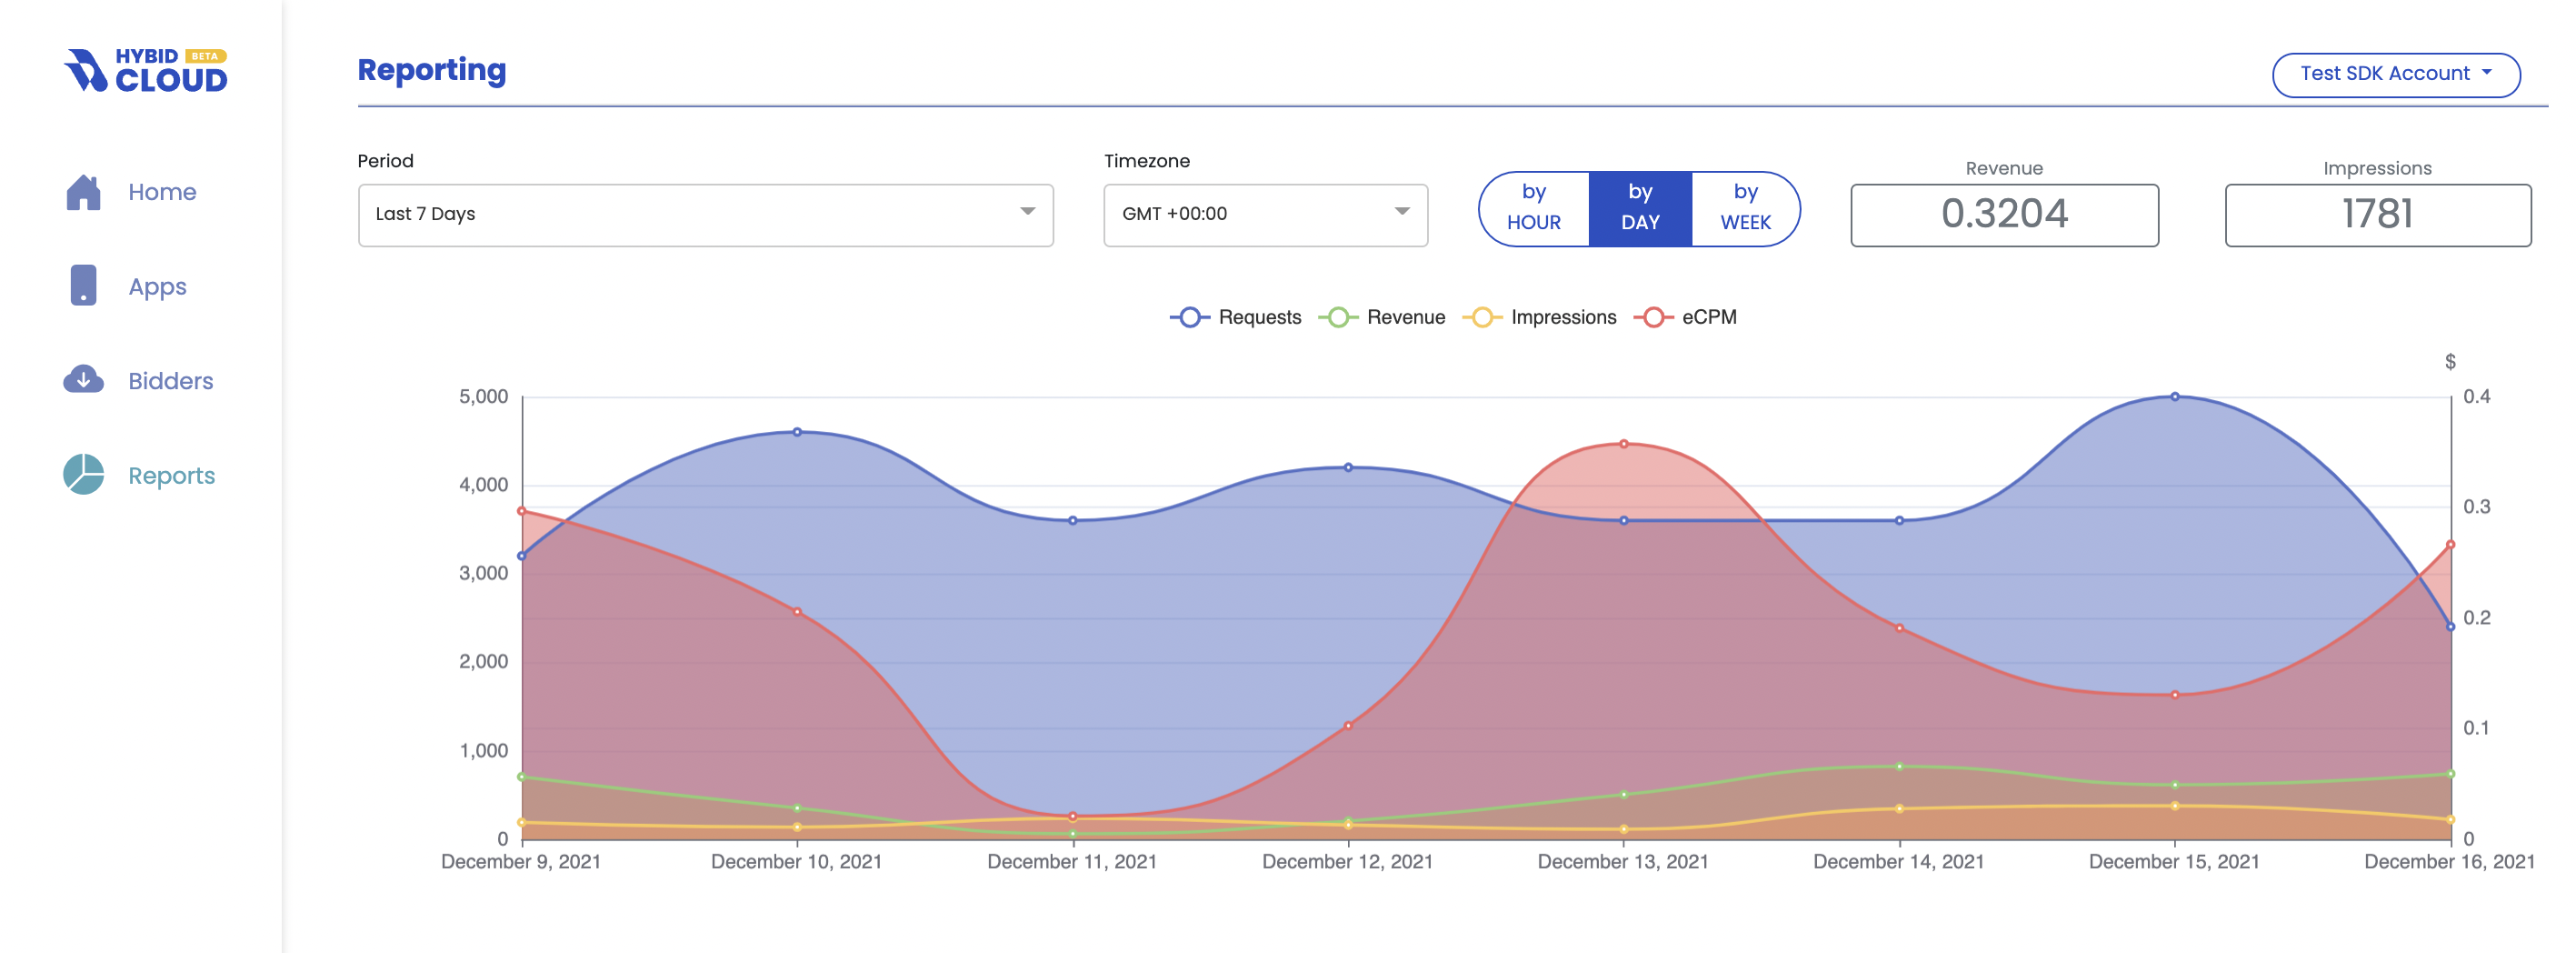
The reporting view allows you to keep a track of your performance per day, hour, week, etc and provides a clutter-free and essential set of dimensions and measures to query.

- Go to Reports on the side menu.
- The Period selection can be changed to reflect your preferred lookback window.
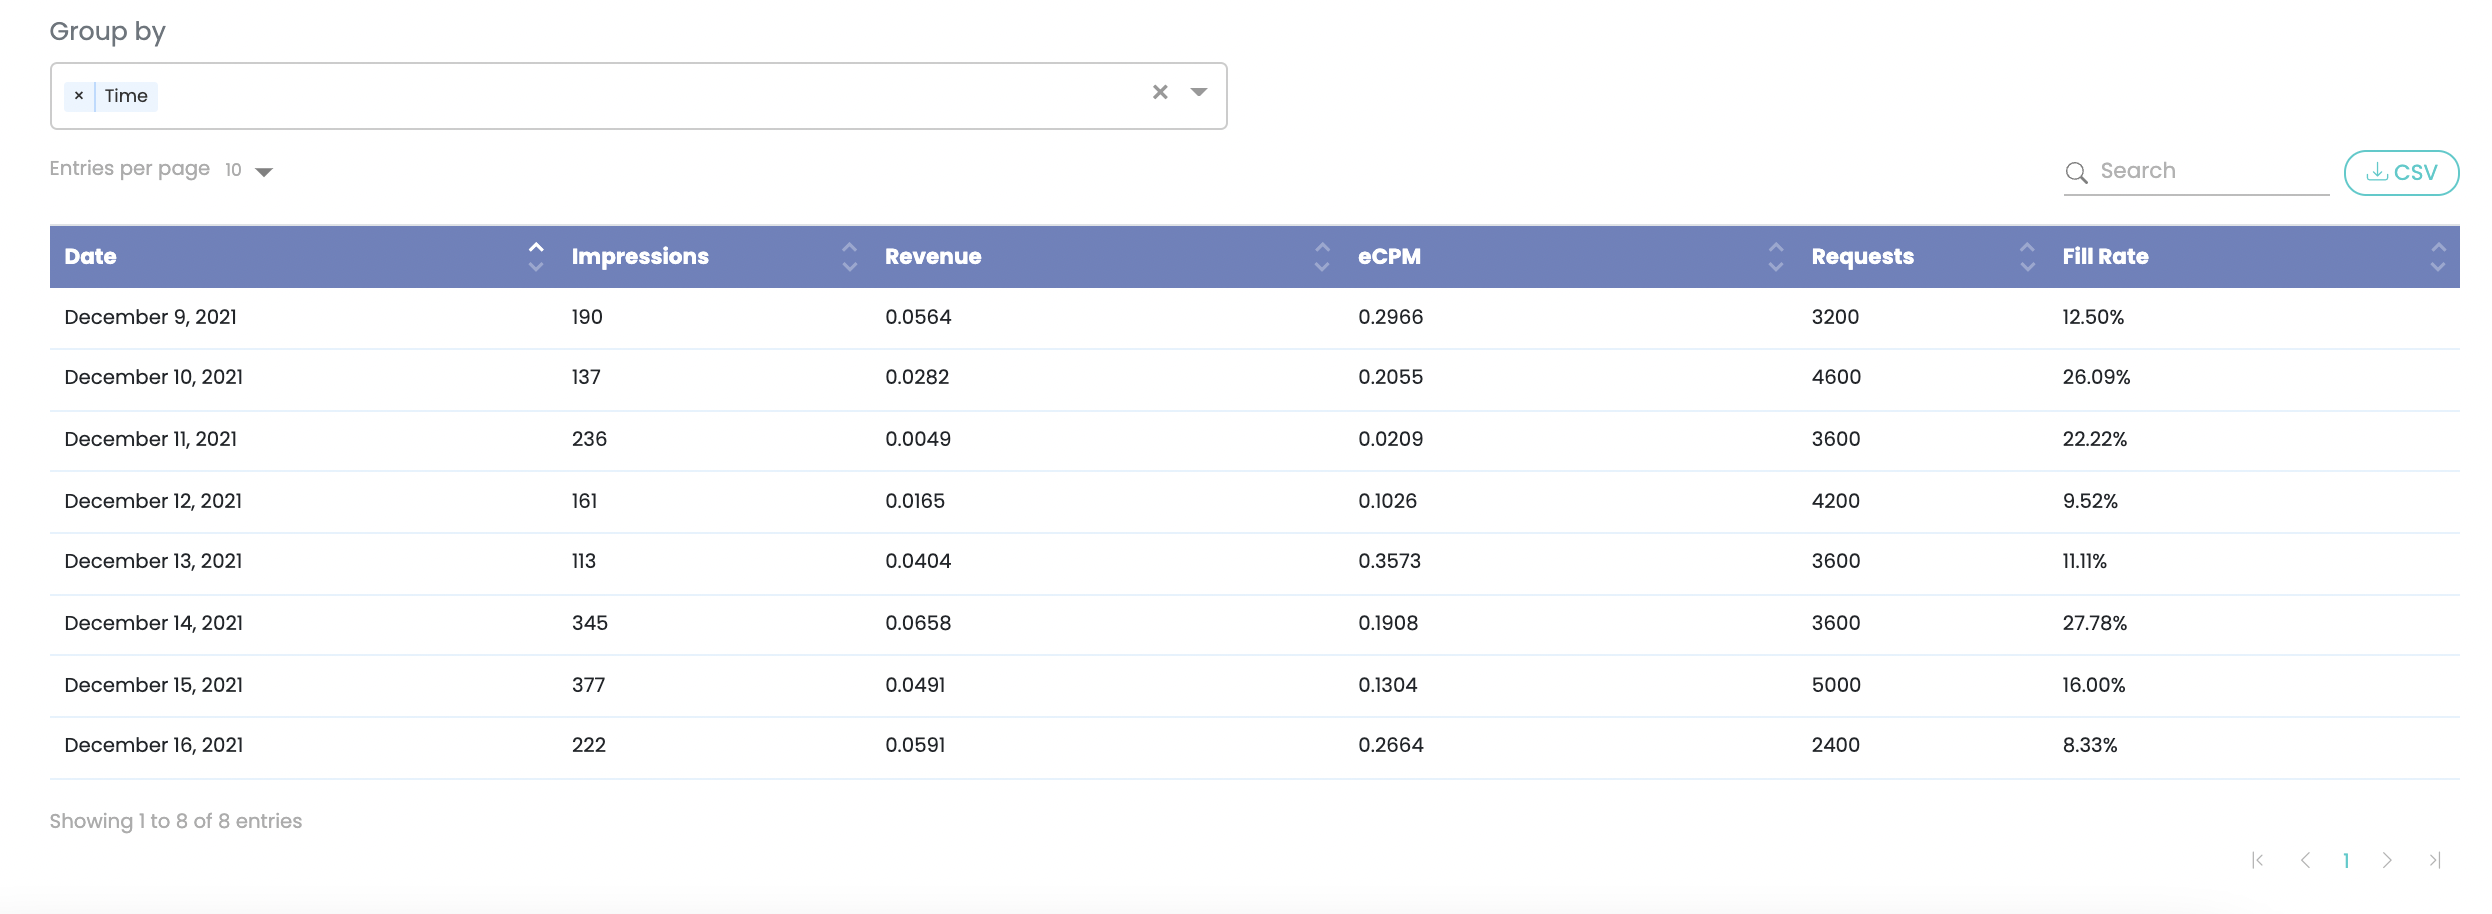
- You can group the values in the reporting table by multiple dimensions, as shown below. Currently, the available metrics are Time, Impressions, Revenue, ecpm, Requests, Fill Rate.

For any further detailed queries or insights that are currently not available on the reporting dashboard, please reach out to your dedicated Account Manager.
Step 5: Publisher Controls
Publisher controls on HyBid Cloud are currently managed by your dedicated account managers. All accounts are enabled for monetization controls, as you are onboarded. This includes,
- Ad Quality
- Privacy and Compliance
- Managing Allowlists
More features and further controls will be enabled on HyBid Cloud for publisher self-serve access in the coming quarters. To know more about this, please contact your account manager.
