Accessing your Deal Portal Dashboard
- Overview
- Navigating your Dashboard
Overview
The Verve Deal Portal Dashboard page provides you a comprehensive workspace to view all active and inactive deals associated with your buyer account, allowing you to create, view, and edit deals.

Deal Portal Dashboard page
Navigating your Dashboard
Below is a detailed breakdown of Dashboard’s key features and components.
Left-hand Navigation menu
The left-hand sidebar contains the navigation menu, which includes options like My Deals, Reporting, Deal Troubleshooting, and Deal Planner. This menu allows you to quickly access different sections of the dashboard.
My Deals
The My Deals menu opens the default Dashboard page, where you can view and manage all your deals. For more details, see the Dashboard Section and Deal Table section.

My Deals: To view and manage deals
The My Deals menu also includes the Deals Library option listed under it.

My Deals: Deal Library
Deal Library
The Deal Library menu opens the Deal Library page, allowing you to choose from all available prepackaged deals or select specific inventory packages tailored to particular targeting needs. Each prepackage includes predefined targeting criteria and its associated eCPM value. For more information, see the Deals Library-Creating a Deal section.
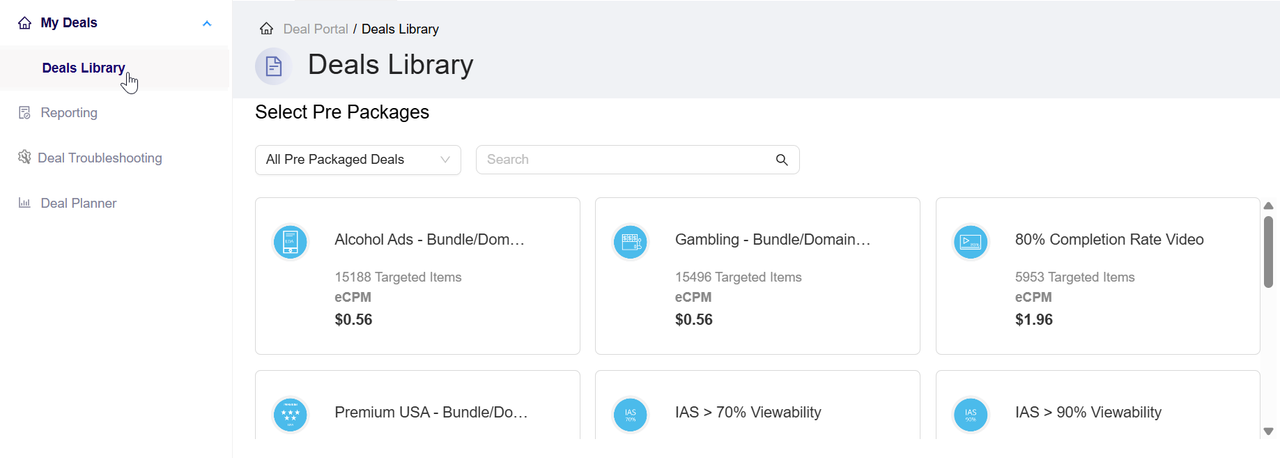
My Deals: Deal Library
Reporting
The Reporting menu navigates you to the Reporting page, where you can create and customize reports. Refer to the Reporting section for additional information.
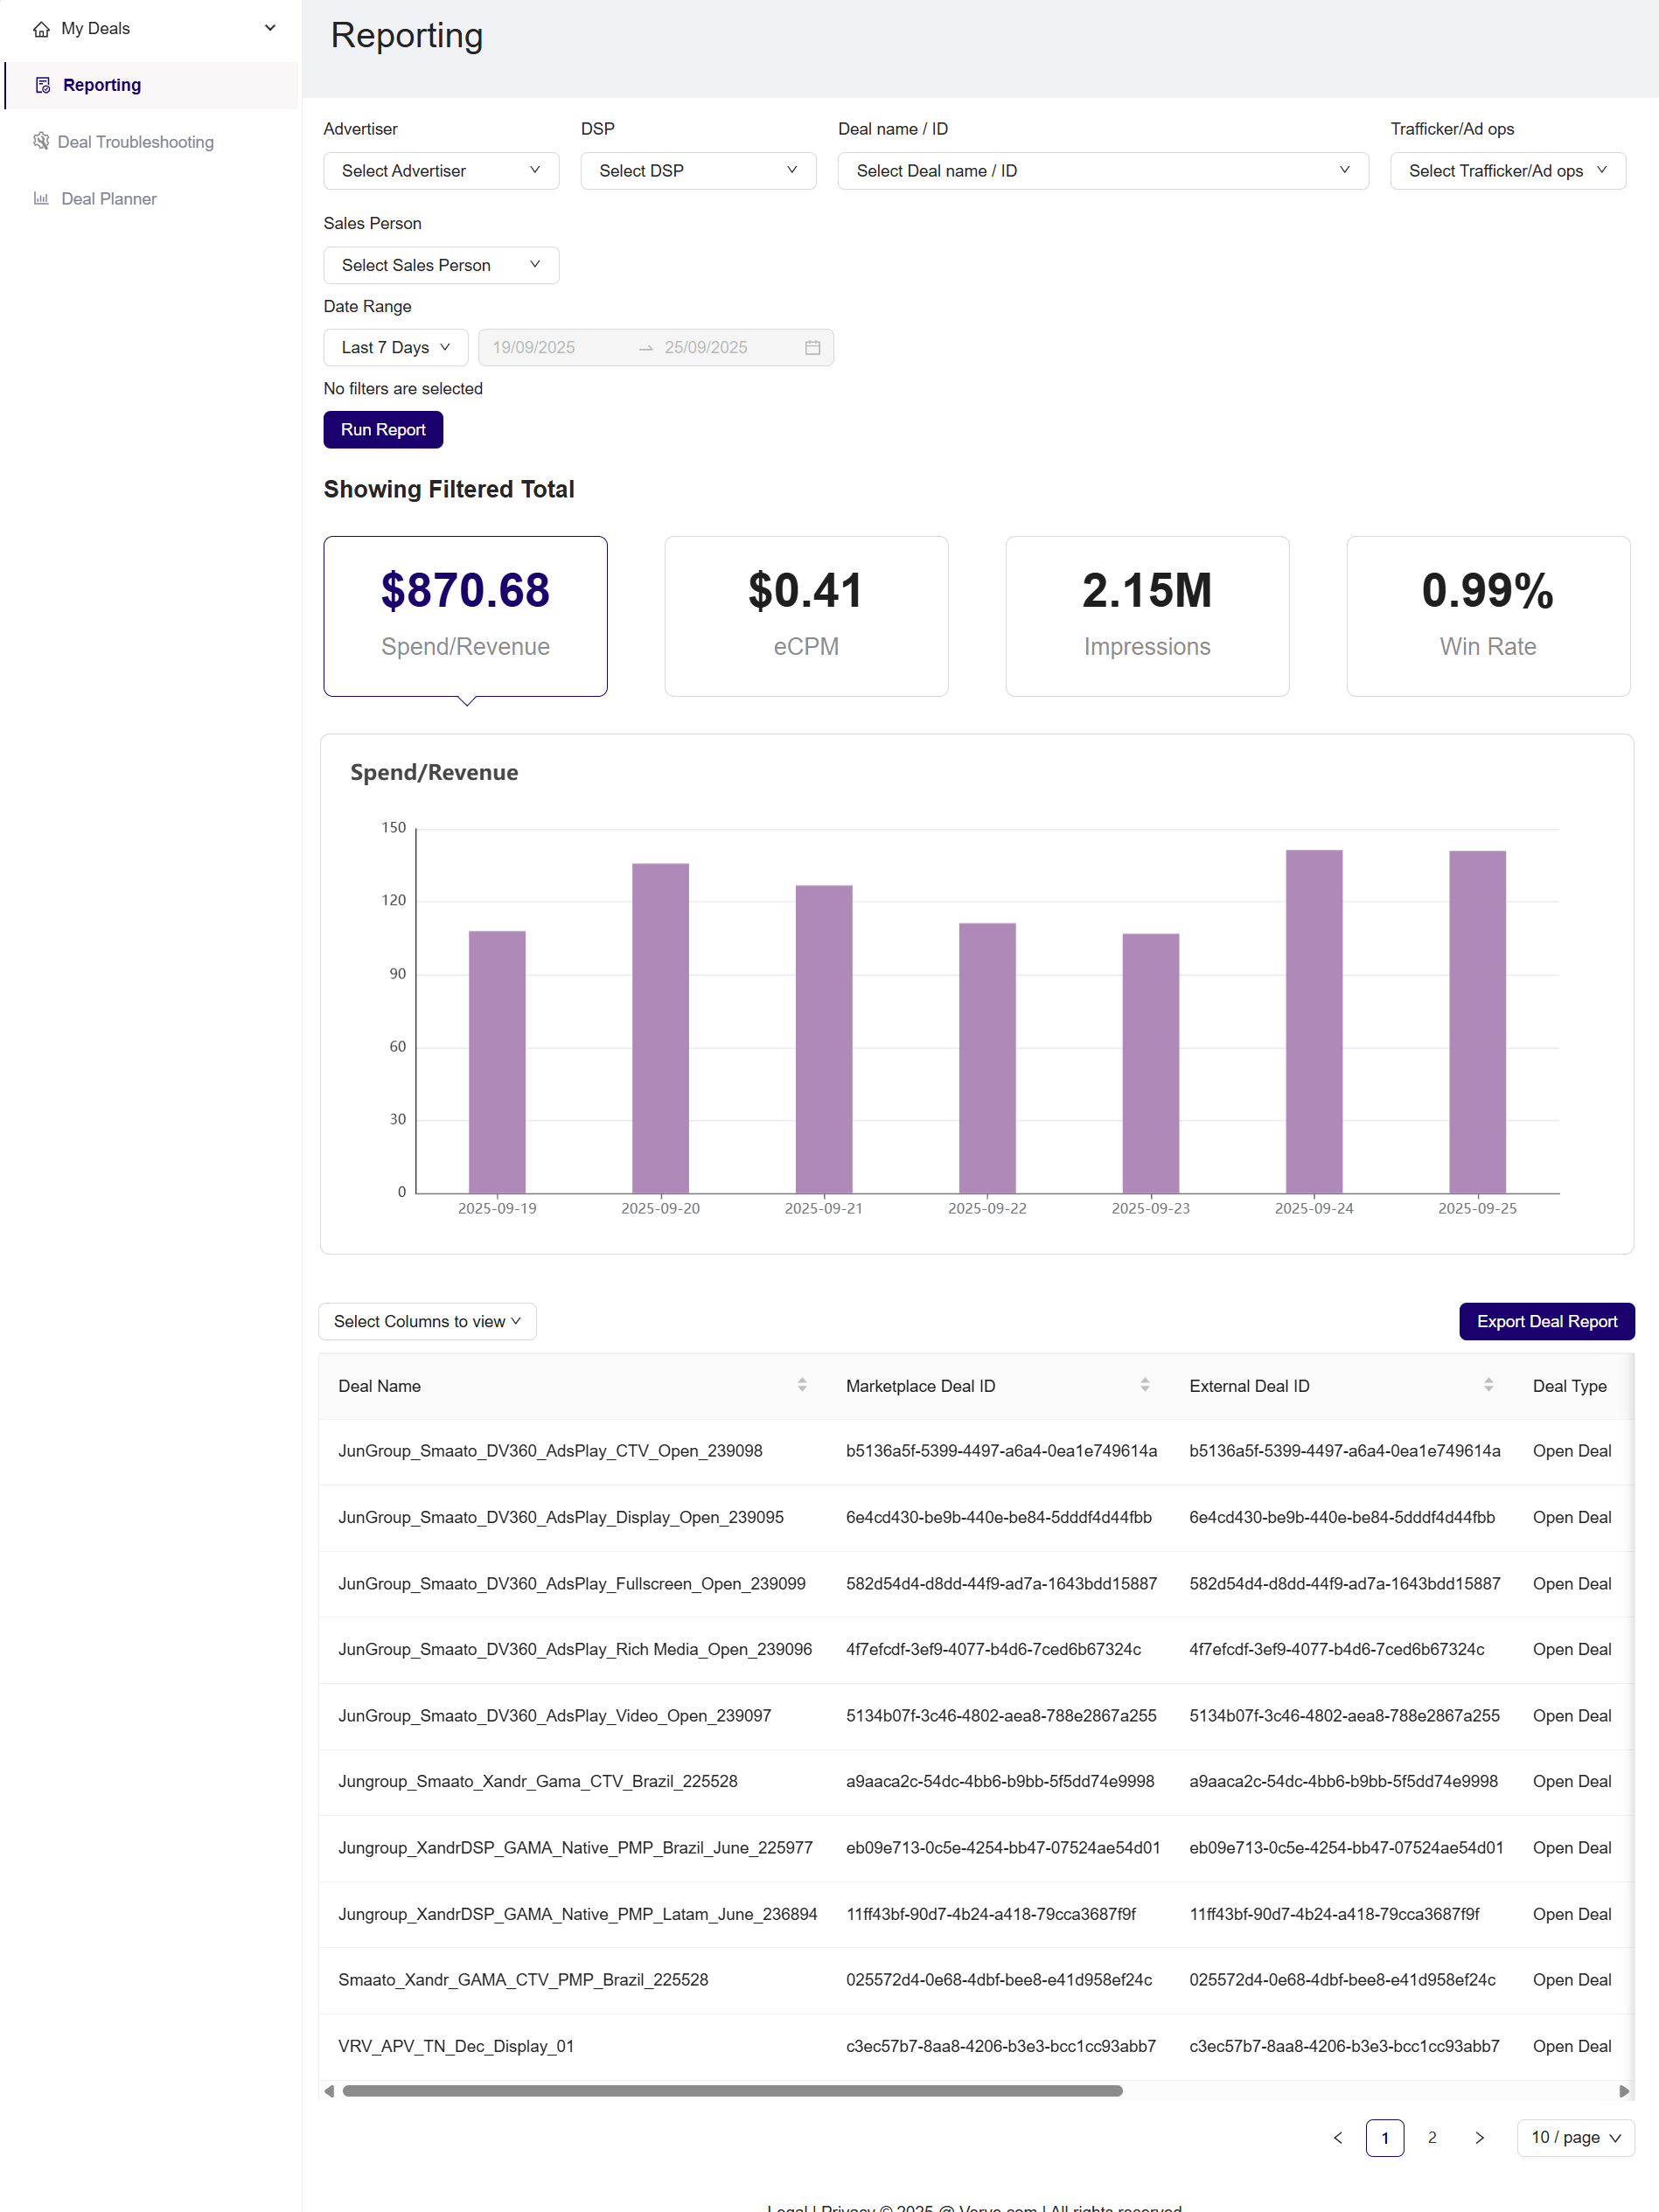
Reporting: To customize and run deal report
Deal Troubleshooting
The Deal Troubleshooting menu provides access to the Deal Troubleshooting page, where you can use the search functionality to select the deal you wish to troubleshoot. For more information, see the Troubleshooting deal by deal name or deal id section.
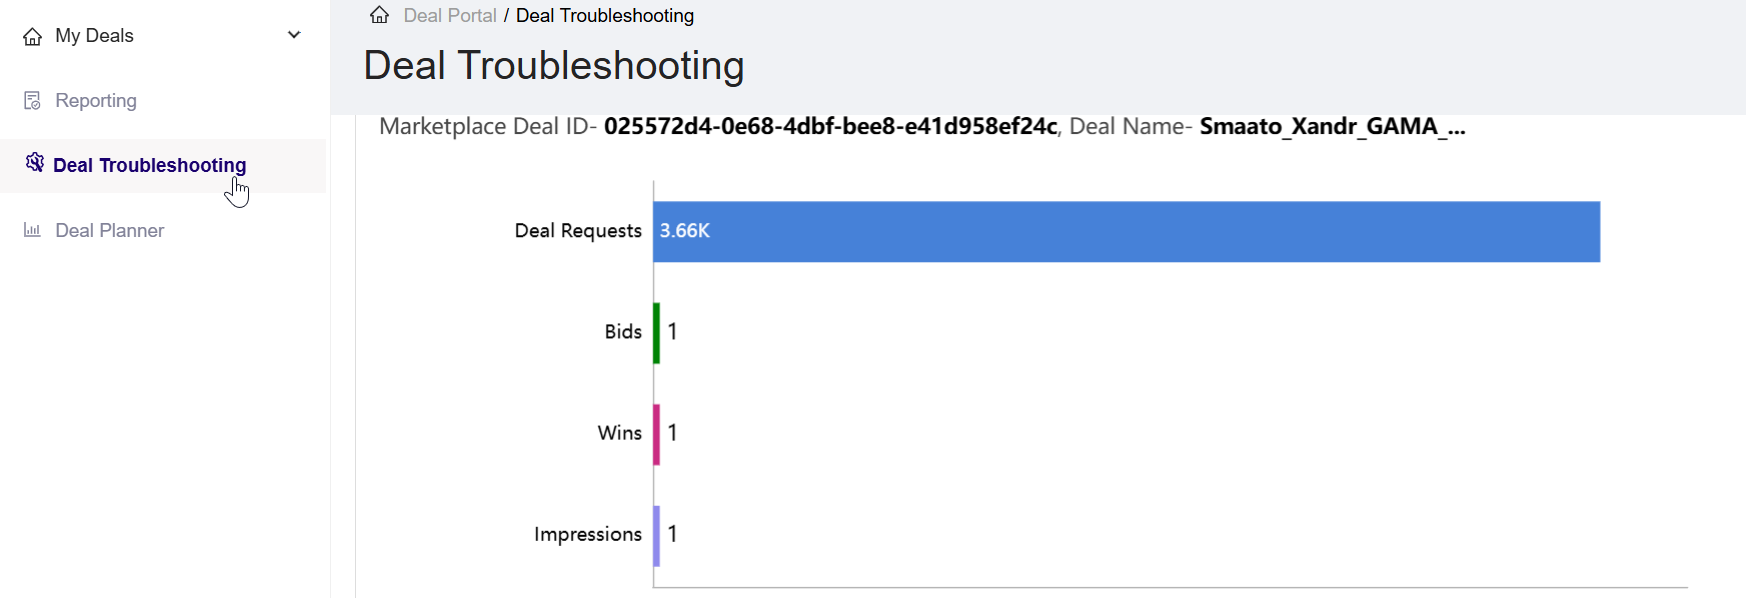
To troubleshoot deal
Deal Planner
The Deal Planner menu opens the Deal Planner page, where you can enter a CPM, set targeting, and estimate available inventory before creating a deal. For more information, see the Deal Planner section.
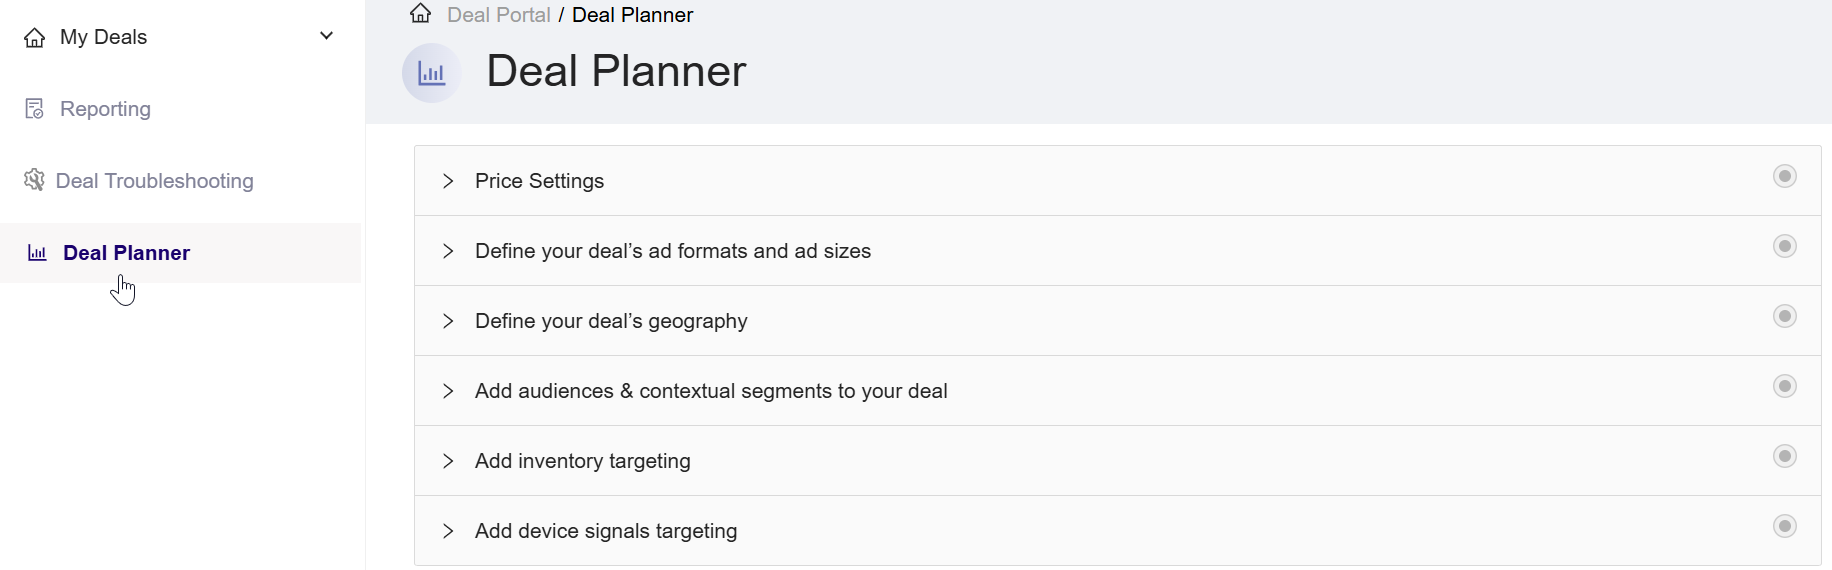
Deal Planner
Dashboard Section
The Deal Portal Dashboard page includes the other following sections:
- User Account Profile: This option is available at the top right corner of the dashboard, providing access to switch accounts, documentation, user settings, and sign out options. For more information, see the Managing your Account Profile section
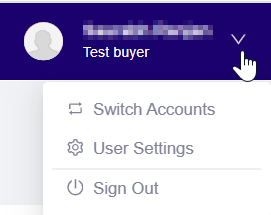
User Account options
- Create New Deal: This button is available on the right side of the dashboard, allowing you to create new deals. Clicking on this button will open the Create Deal page, where you can enter required details like deal name and DSP for creating a deal. For more information, see the Creating a Deal section.

To create a new deal
- Bulk Action: This option is available below the Create New Deal button, allowing you to perform actions on multiple selected deals simultaneously. To use this feature, first select the deals by clicking Select All or Deselect All at the top of the deal table. Once the deals are selected, you can easily apply the available Bulk Action options to start or stop them. For more information, see the Bulk Action section.

To perform action on multiple deals
- Deal Search and Filter:
The Search Your Deal option is available at the left-hand side of the dashboard, allowing you to quickly search your specific deals. You can refine your view of the deals by using the following options:- Search Your Deals: Search for deal details using the Deal Name, Deal Id, Buyer Account Name, Advertiser Name, Seat Name, DSP, or Created By in the search textbox.

Search your deal
-
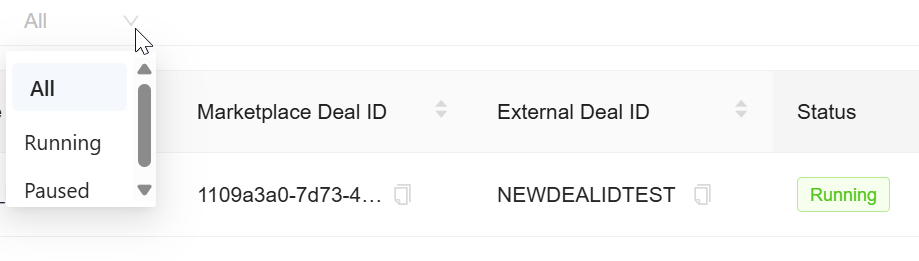
Deal Filter:
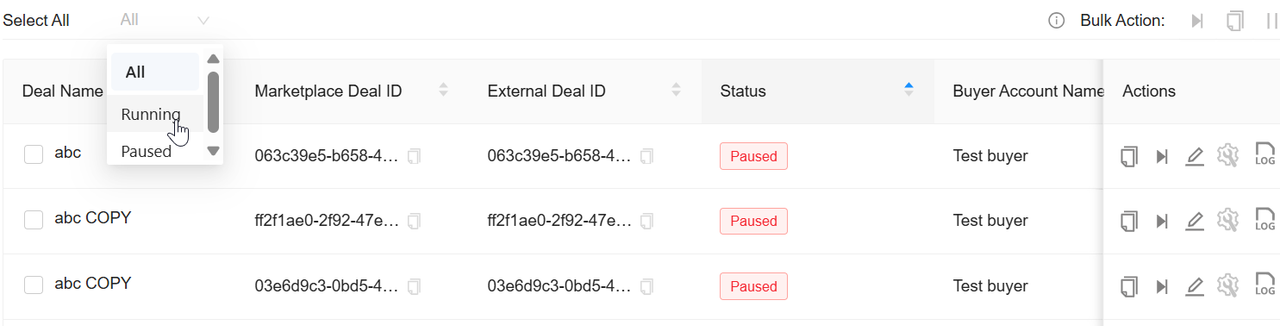
The Deal Filter is available below the Search Your Deal option, allowing you to quickly filter deals based on their status.- Status Filter (All, Running, or Paused): Use this option to filter deals based on their status, such as All, Running, or Paused. Once filtered, you can perform bulk actions, such as running or pausing the selected deals, using the options available under Bulk Action.

To filter deal by status
-
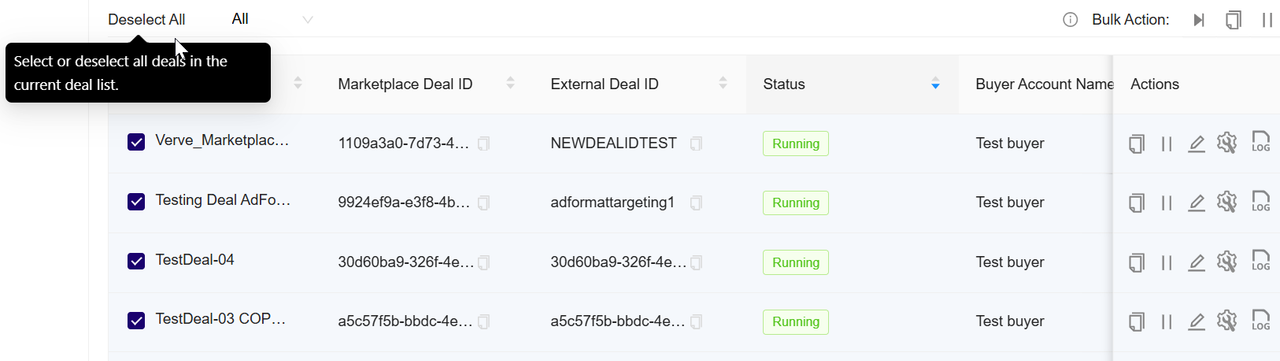
Select All/Deselect All: Use this option to select or deselect all deals simultaneously. Once selected, you can perform bulk actions, such as running or pausing the selected deals, using the options available under Bulk Action.

To select or deselect all deals
Bulk Action
The Bulk Action feature lets you updates the status of multiple deals simultaneously. You can clone, run and pause all selected deals with a few simple steps.
Cloning Multiple Deals
To clone multiple deals, follow these steps:
- From the Deal Filter dropdown, choose one of the filter options: All, Running, or Paused.
To filter deal by status
- This will display the deals based on the selected status.

Display deal by status
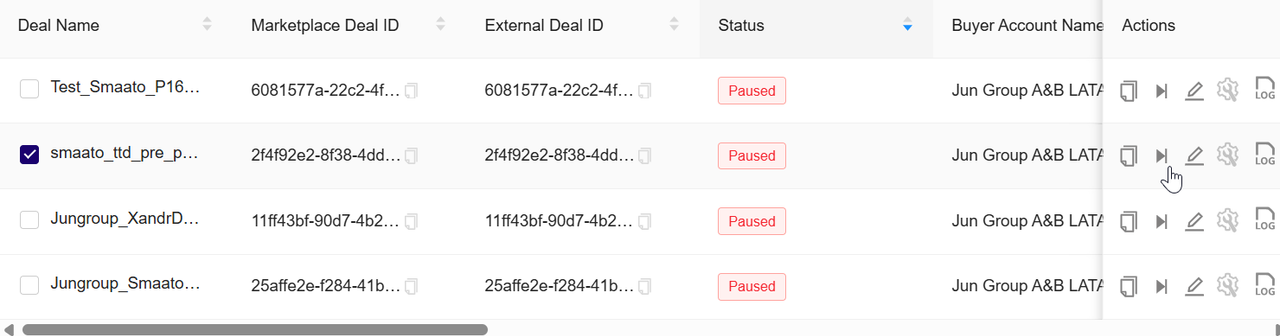
- Click Select All to select all deals displayed in the list, or manually select individual deals by clicking the checkboxes next to each deal name.
Deal Selection
- After selecting the deals, click on the
 icon from the Actions option.

To clone selected deals
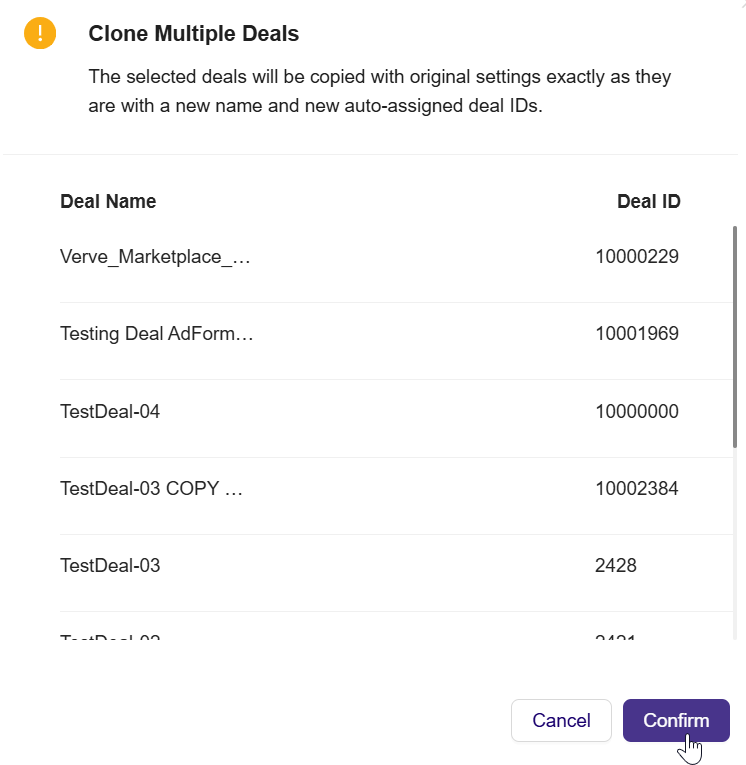
- A confirmation dialog will open, displaying the selected deals.
- In the confirmation dialog, you will see a list of selected deals, including their Deal Names and Deal IDs (for example, Test2 COPY COPY, Test2 COPY, abc COPY COPY, etc.).

To confirm multiple clone deals
- Review the information in the dialog. The system will inform you that the selected deals will be cloned with original settings, new names, and new auto-assigned deal IDs.
- Click Confirm to proceed with cloning the selected deals.
To confirm multiple clone deals
- The system will create exact copies of the selected deals, assigning them new deal names and new deal IDs.

Create multiple clone deals
- These cloned deals will now appear in the Deal Portal, and you can manage them as needed.
Running Multiple Deals
To run multiple deals, follow these steps:
- From the Deal Filter dropdown, click Paused.

Filter your deal by Paused
- The system will display a list of inactive deals.

View deals with Paused status
- Click Select All to select all inactive deals, or alternatively you can manually select the paused deals you wish to active.

Select or deselect all paused deals
- After selecting multiple inactive deals, click the
 icon in the Bulk Action option to activate the selected deals.

To run all the paused deals
- A confirmation box will open. Click OK to start the deals or Cancel to discard the action.

Confirm to run all selected deals
- Once confirmed, the status of the selected deals will change to Running.

All selected deals status change to running
Pausing Multiple Deals
To pause multiple deals, follow these steps:
- From the Deal Filter dropdown arrow, click Running.
Filter your deal by Running
- The system will display list of active deals.
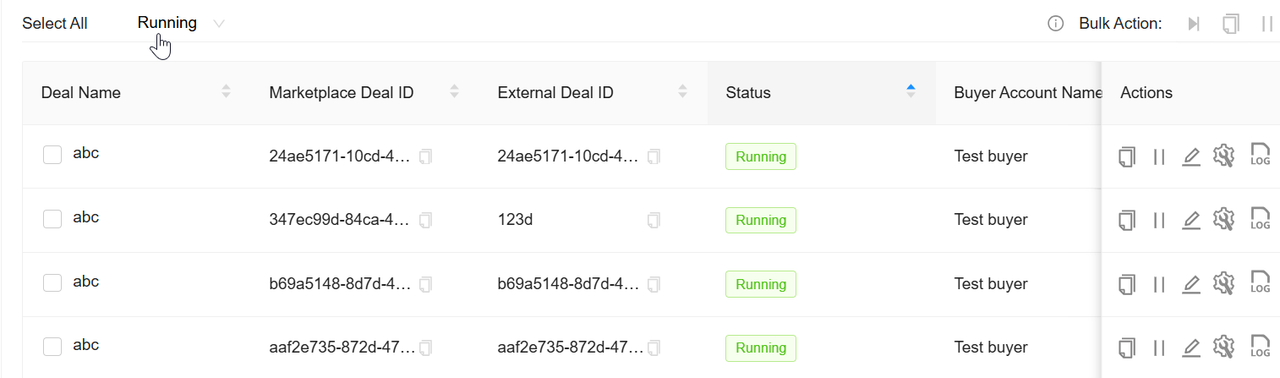
View all running deals
- Click Select All to select all active deals or alternatively click manually to select the active deals you wish to pause**.**

Select or deselect all running deals
- After selecting all active deals, click the
 icon in the Bulk Action menu to pause all active deals.

To pause all selected Running deals
- A confirmation box will open. Click OK to pause the deals or Cancel to discard the action.
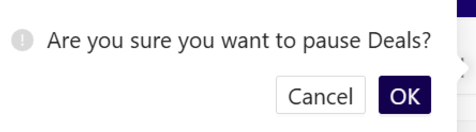
Confirmation to pause all selected deals
- Once confirmed, the status of the selected deals will change to Running.
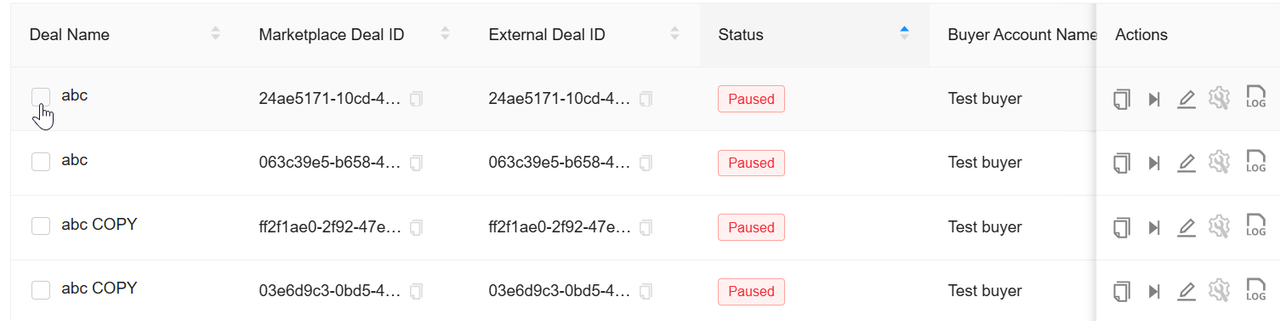
All selected deals status change to Paused
Note:You can also update the status of individual deals by clicking the
Deal Table
The Deal Table is located at the center of the Dashboard and displays an overview of all your deals in a tabular format. It provides information about the deal fields:
Deal fields
| Deal Field | Description |
|---|---|
| Deal Name | The name of the deal. |
| Deal ID | A unique identifier assigned to each deal. |
| Status | The current status of the deal (Running, Paused or All). |
| Buyer Account Name | The name of the buyer associated with the deal. |
| Advertiser | The name of the advertiser associated with the deal. |
| Seat Name | Displays the seat name used in the bidding process. |
| Start Date | The start date of the deal. |
| End Date | The end date of the deal. |
| eCPM (Effective Cost Per Mile) | Represents the effective average cost per thousand impressions earned by the deal |
| Spend | The total spend associated with the deal up to the current date. |
| DSP (Demand-Side Platform) | The platform responsible for executing the deal. |
| Creation Date | The date on which deal was created. |
| Created By | The user who created the deal. |
| Actions | Provides you the options to clone, run, pause, edit or troubleshoot deal. |
Actions
The Actions feature in the Deal Portal allows you to manage deals with the following options:
- Clone a deal
- Run a deal
- Pause a deal
- Edit a deal
- Troubleshoot a deal
- Request a change log
Cloning a Deal
To clone a single deal, follow these steps:
Follow the initial step mentioned from point no 1 to 2 in Cloning Multiple Deals to filter the deal.
- Select a deal from the deal list you wish to clone.

Select specific deal for clone
- After selecting deal, click on the
 icon.
icon.

To clone a Deal
- If you choose Clone The Deal, the deal will be duplicated with the original settings, and you will see a confirmation message

Clone deal options
- If you choose Modify Settings Before Cloning, make any necessary adjustments to the Deal Settings page.

Make changes to Deal Settings page
- The new cloned deal will be created and displayed in the My Deals section with the updated or identical settings, depending on your choice.
Running a Deal
To run a specific paused deal, follow these steps:
- From the Deal Filter dropdown arrow, click Paused.

Filter deal by Paused
- The system will display a list of inactive deals.

Show all paused deals
- Select the specific Paused deal from the Deal list you wish to active.

Select specific paused deal
- After selecting specific deal, click the icon under the Actions column to run a deal.
To start the pause deal
- A confirmation pop-up will open. Click OK to active a deal or Cancel to discard the action.

Confirmation to start deal
- Once confirmed, the deal’s status will change to Running.

Deal status changes to Running
Pausing a Deal
To pause a running deal, follow these steps:
- From the Deal Filter dropdown arrow, click Running.

Filter deal by Running
- The system will displays a list of active deals.

Show all active running deals
- Click the icon under the Actions column to pause a deal.

To pause active deal
- A confirmation pop-up will open. Click OK to pause the deal or Cancel to discard the action.

Confirmation to pause a deal
- Once confirmed, the deal’s status will change to Paused.

Deal status change to Paused
Editing a Deal
Follow these steps to edit the deal settings:
- In the Actions column, click the
 icon for the deal you wish to edit.

To edit a deal
- You will be redirected to the Edit Deal page. Update the desired settings and targeting options. For more details on editing a deal, see the Editing a Deal section.
Troubleshooting a Deal
Follow these steps to troubleshoot a deal:
-
Navigate to the list of active deals you wish to troubleshoot.
-
In the Actions column, click the
 icon for the deal you wish to troubleshoot.

To troubleshoot a deal
- You will be redirected to the Deal Troubleshooting page for that specific deal, allowing you real-time insights and tools for managing active deals effectively. For more information, see the Troubleshooting a deal from dashboard section.
Change Log
The Change Log functionality in the Deal Portal allows you to track and audit any modification made to the deal over time. You can use this feature to view changes such as add and updates to status, targeting parameters, or configuration fields.
Follow these steps to retrieve the Change Log for a specific deal:
-
Navigate to the Deal Portal.
-
After login, the Dashboard page appears by default.

Dashboard Page
- In the Actions column of the corresponding deal row, click the
 icon.
icon.
Locate the deal
- A confirmation dialog will appear prompting you to send the change log to your registered email.

Open the Change Log
- Click Confirm to receive a copy of the change log as an Excel file in your inbox.

Confirm the request
- Within a few moments, You will receive an email containing a button to download the change log file in excel format.

Check your email
- This Excel file includes details such as the Action ID, the field that was changed, the action type (Add/Update), previous and new values, timestamps, and the name of the person who made the change.

Preview the change log excel file
Note: Download Rate LimitingTo ensure system stability and prevent excessive server load, download requests for change logs are rate-limited:
- Maximum 1 download per minute
- Maximum 10 download per hour
If these limits are exceeded, a message will appear (for example, "You can only download logs once per minute. Please wait a moment and try again").