Creating a Deal
Overview
The Deal Portal allows you to create a new deal for an ad campaign. The Deal Settings is essential workflow for creating a new deal within the Deal Portal. However, other workflows include Price Settings and Deal Reporting Label options, which help further customize and track your deal.
Prerequisites
Before creating a deal, ensure the following requirements are met:
-
You have a registered user account and buyer account
See Registering your User Account -
You are logged into the Deal Portal.
See Logging into the Deal Portal
Accessing the Create Deal Page
To access the Create Deal page, follow these steps:
- Navigate to the Deal Portal Dashboard page and then click the Create New Deal button.

Create a new deal
- The Create Deal page will open, allowing you to begin setting up your deal.
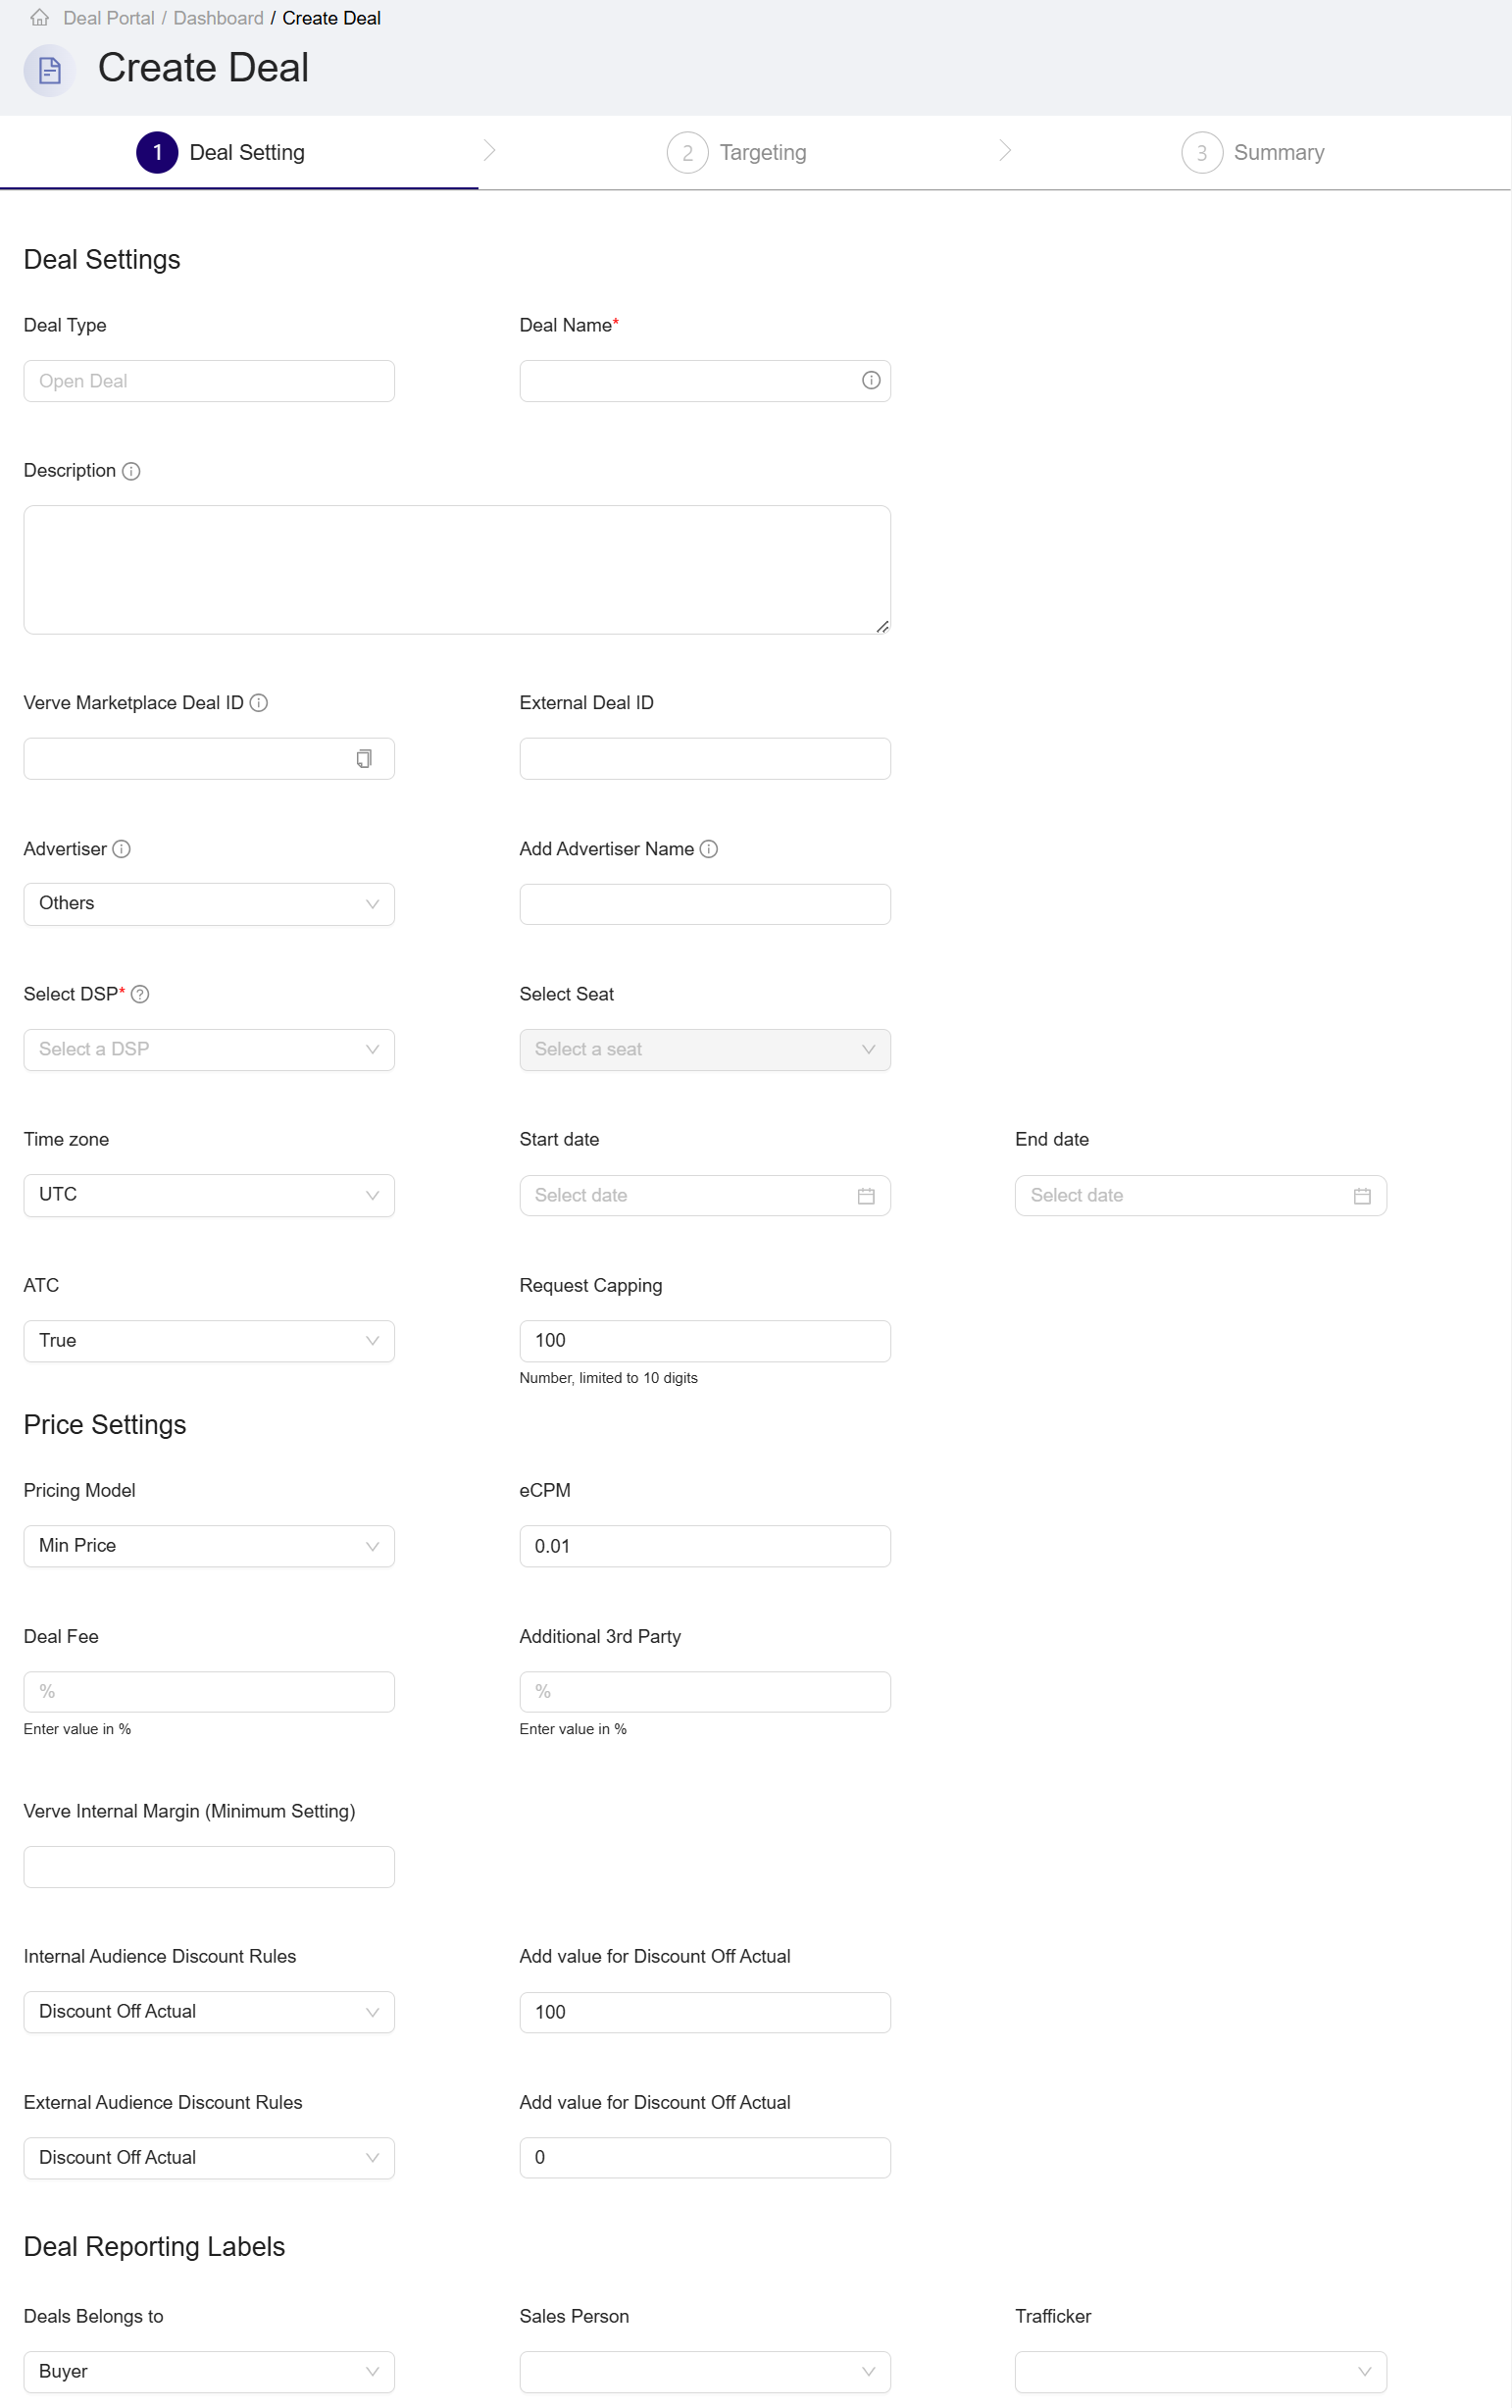
Create a deal page
Creating Deal Workflow
The section provides workflows for creating new deal in the Deal Portal, including:
Deal Settings Workflow
In the Create Deal page, the Deal Settings is the first section in the deal creation process. In this section, you are required to fill in the Deal Name and DSP fields; all other fields are optional. For the Deal Settings field definition, see the Data Dictionary for Deal Settings page.
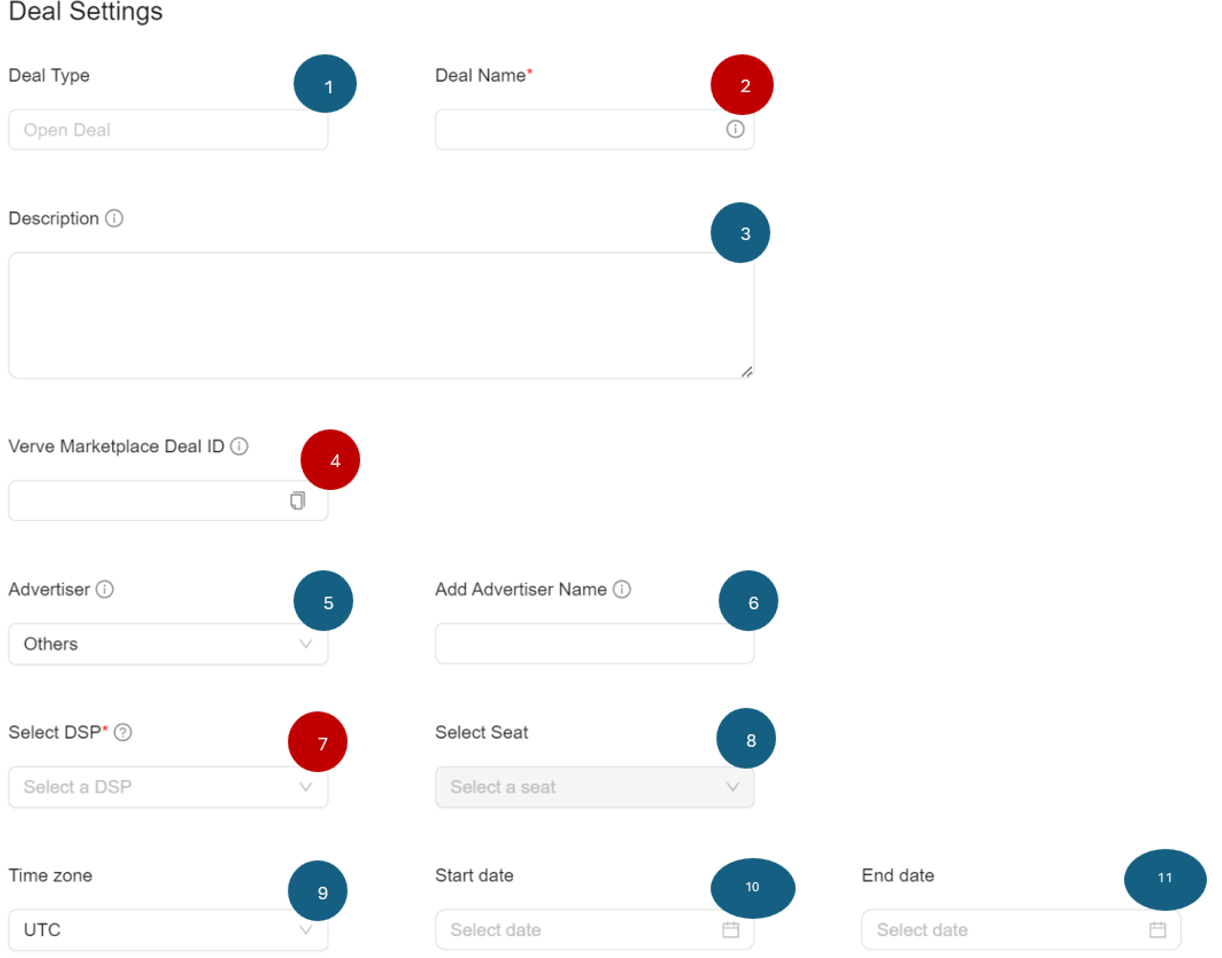
Deal Settings
- Deal Type:
- The Deal Portal auto-populates the Deal Type dropdown with the Open Deal option by default. More deal types will be available In the future.
Note:Only Open Deals are available for Verve Marketplace.
- Deal Name (Required):
- Enter a unique deal name in the Deal Name textfield.
Note:This field is a mandatory field and allows up to 255 characters.
-
Description (Optional):
- Enter a description for your deal in the Description textfield.
-
Verve Marketplace Deal ID:
- The system automatically generates the Verve Marketplace Deal ID, and you cannot edit it
Note:If you add an External Deal ID, the system will gray out the Verve Marketplace Deal ID, and you must pass the external deal ID downstream to the Demand Side Platforms.
-
Advertiser (Optional):
- Click the Advertiser dropdown menu and select the advertiser associated with the deal.
-
Add Advertiser Name (Optional):
- If your advertiser name is not listed, select Others from the Advertiser dropdown menu and use the Add Advertiser Name field to input a new advertiser.
-
DSP (Required):
-
Click the Demand Side Platform (DSP) dropdown menu and select the DSP associated with the account..
-
This field is mandatory and displays the available DSP in alphabetical order.
-
Note:You cannot change the DSP after saving the deal.
- Select Seat (Optional):
- Click the Select Seat dropdown menu and select a seat, which is limited to those associated with the selected DSP and buyer.
Note:This field is optional for MVP, and the seats are listed alphabetically
-
Time Zone (Optional):
- Choose a time zone from the list of global time zones.
-
Start Date (Optional):
- Click the date picker to select the start date for the deal.
- If you do not select a start date, the system will default to the date the deal is set live.
- You can select a start date without an end date.
- You can set the start date to the current date or a future date, but you cannot select a past date
Note:The deal must be in active status for it to start on the selected start date. If the deal is paused when the start date is reached, it will remain paused and not go live.
- End Date (Optional):
- Click the date picker to select the end date for the deal. You select the time in a 24-hour format.
Note:
- You can set the end date to the current date or any future date, but you cannot select a past date.
- If you do not select an end date, the system defaults to the date when the deal was paused.
- You can set an end date for your deal even if no start date is provided
Price Settings Workflow
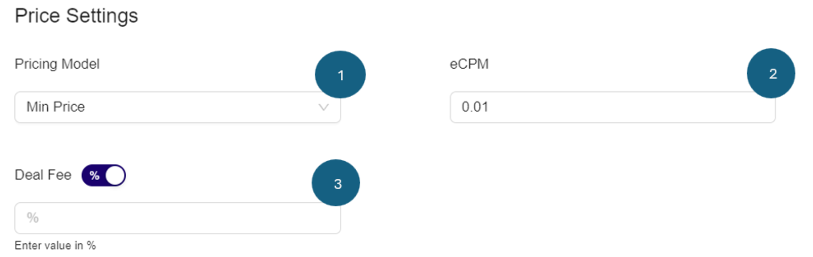
In the Create Deal page, the Price Settings is the next section in the deal creation process. All the fields are optional. For the Price Settings field details, see the Data Dictionary for Price Settings page.
Follow these steps in the Price Settings section:
Price Settings
- Price Model(Optional)
- From the Pricing Model dropdown, click to select from following available options:
- Min Price (Default)
- Fixed Price
- From the Pricing Model dropdown, click to select from following available options:
Note:If you are not sure which model to select, use the default Min Price option.
- eCPM (Optional)
- Use the up/down arrows to increment or decrement the eCPM value in currency format. Alternatively, you can enter the desired eCPM value in currency format.
Note:If you enter fees as a fixed dollar amount, you can input values with up to 2 decimal places, such as $24.75.
Deal Reporting Labels Workflow
In the Deal Reporting Labels section, all the fields are optional. For the Deal Reporting Labels fields details, see the Data Definition for Deal Reporting Labels section.

Deal Reporting labels
- Sales Person (Optional):
- From the Sales Person dropdown menu, Click to select the salesperson responsible for the deal.
Note:The list of salespeople may be limited to users assigned to the buyer’s account.
- Trafficker (Optional):
- From the Trafficker dropdown menu**,** click to select the appropriate trafficker responsible for managing the deal.
Saving Deal Settings
To successfully create a deal, first ensure you fill out all required fields on the Create Deal page, including Deal Name and DSP in the Deal Settings section.
-
Click the Save and Continue button to save your deal setting details.
-
After you save, the system automatically redirects you to the Targeting section of the workflow.